JIRA Webhook
Connect Aisle workflows to your JIRA instance to trigger workflows from JIRA events like issue creation, updates, and comments.
Connector Setup
First, enable the JIRA connector: https://app.aisle.sh/connectors/jira
This is the connector. You can simply enable it to use these integrations in workflows. However - if you want your workflow to be triggered by an external event (webhook) in these systems - such as a JIRA ticket being created - you have some custom setup to do.
Setup Instructions
Step 1: Create the Workflow
Create a new workflow and select JIRA as the trigger type. This will automatically configure your workflow to receive JIRA webhook events.

Step 2: Configure Trigger Settings
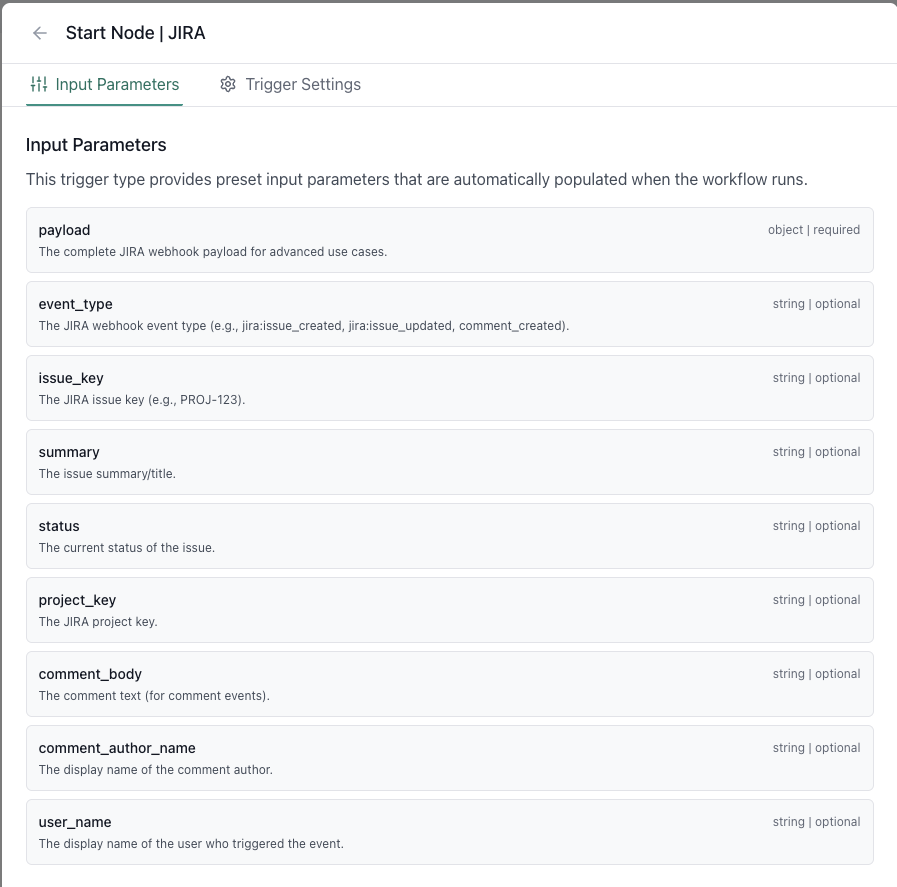
Once created, your workflow will be automatically configured with the necessary input parameters. You can view and configure these in the Input Parameters tab, and access app-specific settings in the Trigger Settings tab.
|
|
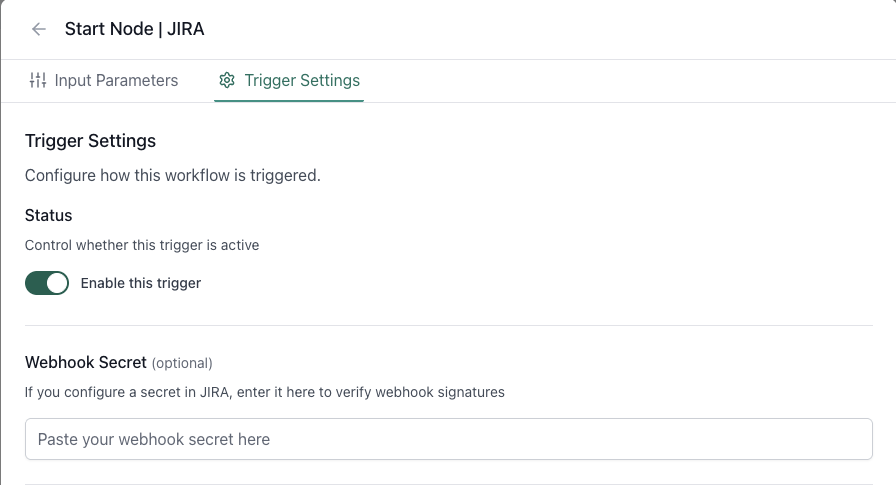
In the Trigger Settings tab, you can:
- Enable/disable the trigger - Control whether this trigger is active
- Set the Webhook Secret (optional) - If you configure a secret in JIRA, enter it here to verify webhook signatures
The workflow input parameters are automatically configured and include:
event_type- The JIRA webhook event type (e.g.,jira:issue_created,jira:issue_updated,comment_created)issue_key- The JIRA issue key (e.g.,PROJ-123)summary- The issue summary/titlestatus- The current status of the issueproject_key- The JIRA project keycomment_body- The comment text (for comment events)comment_author_name- The display name of the comment authoruser_name- The display name of the user who triggered the eventpayload- The complete JIRA webhook payload (JSON) for advanced use cases
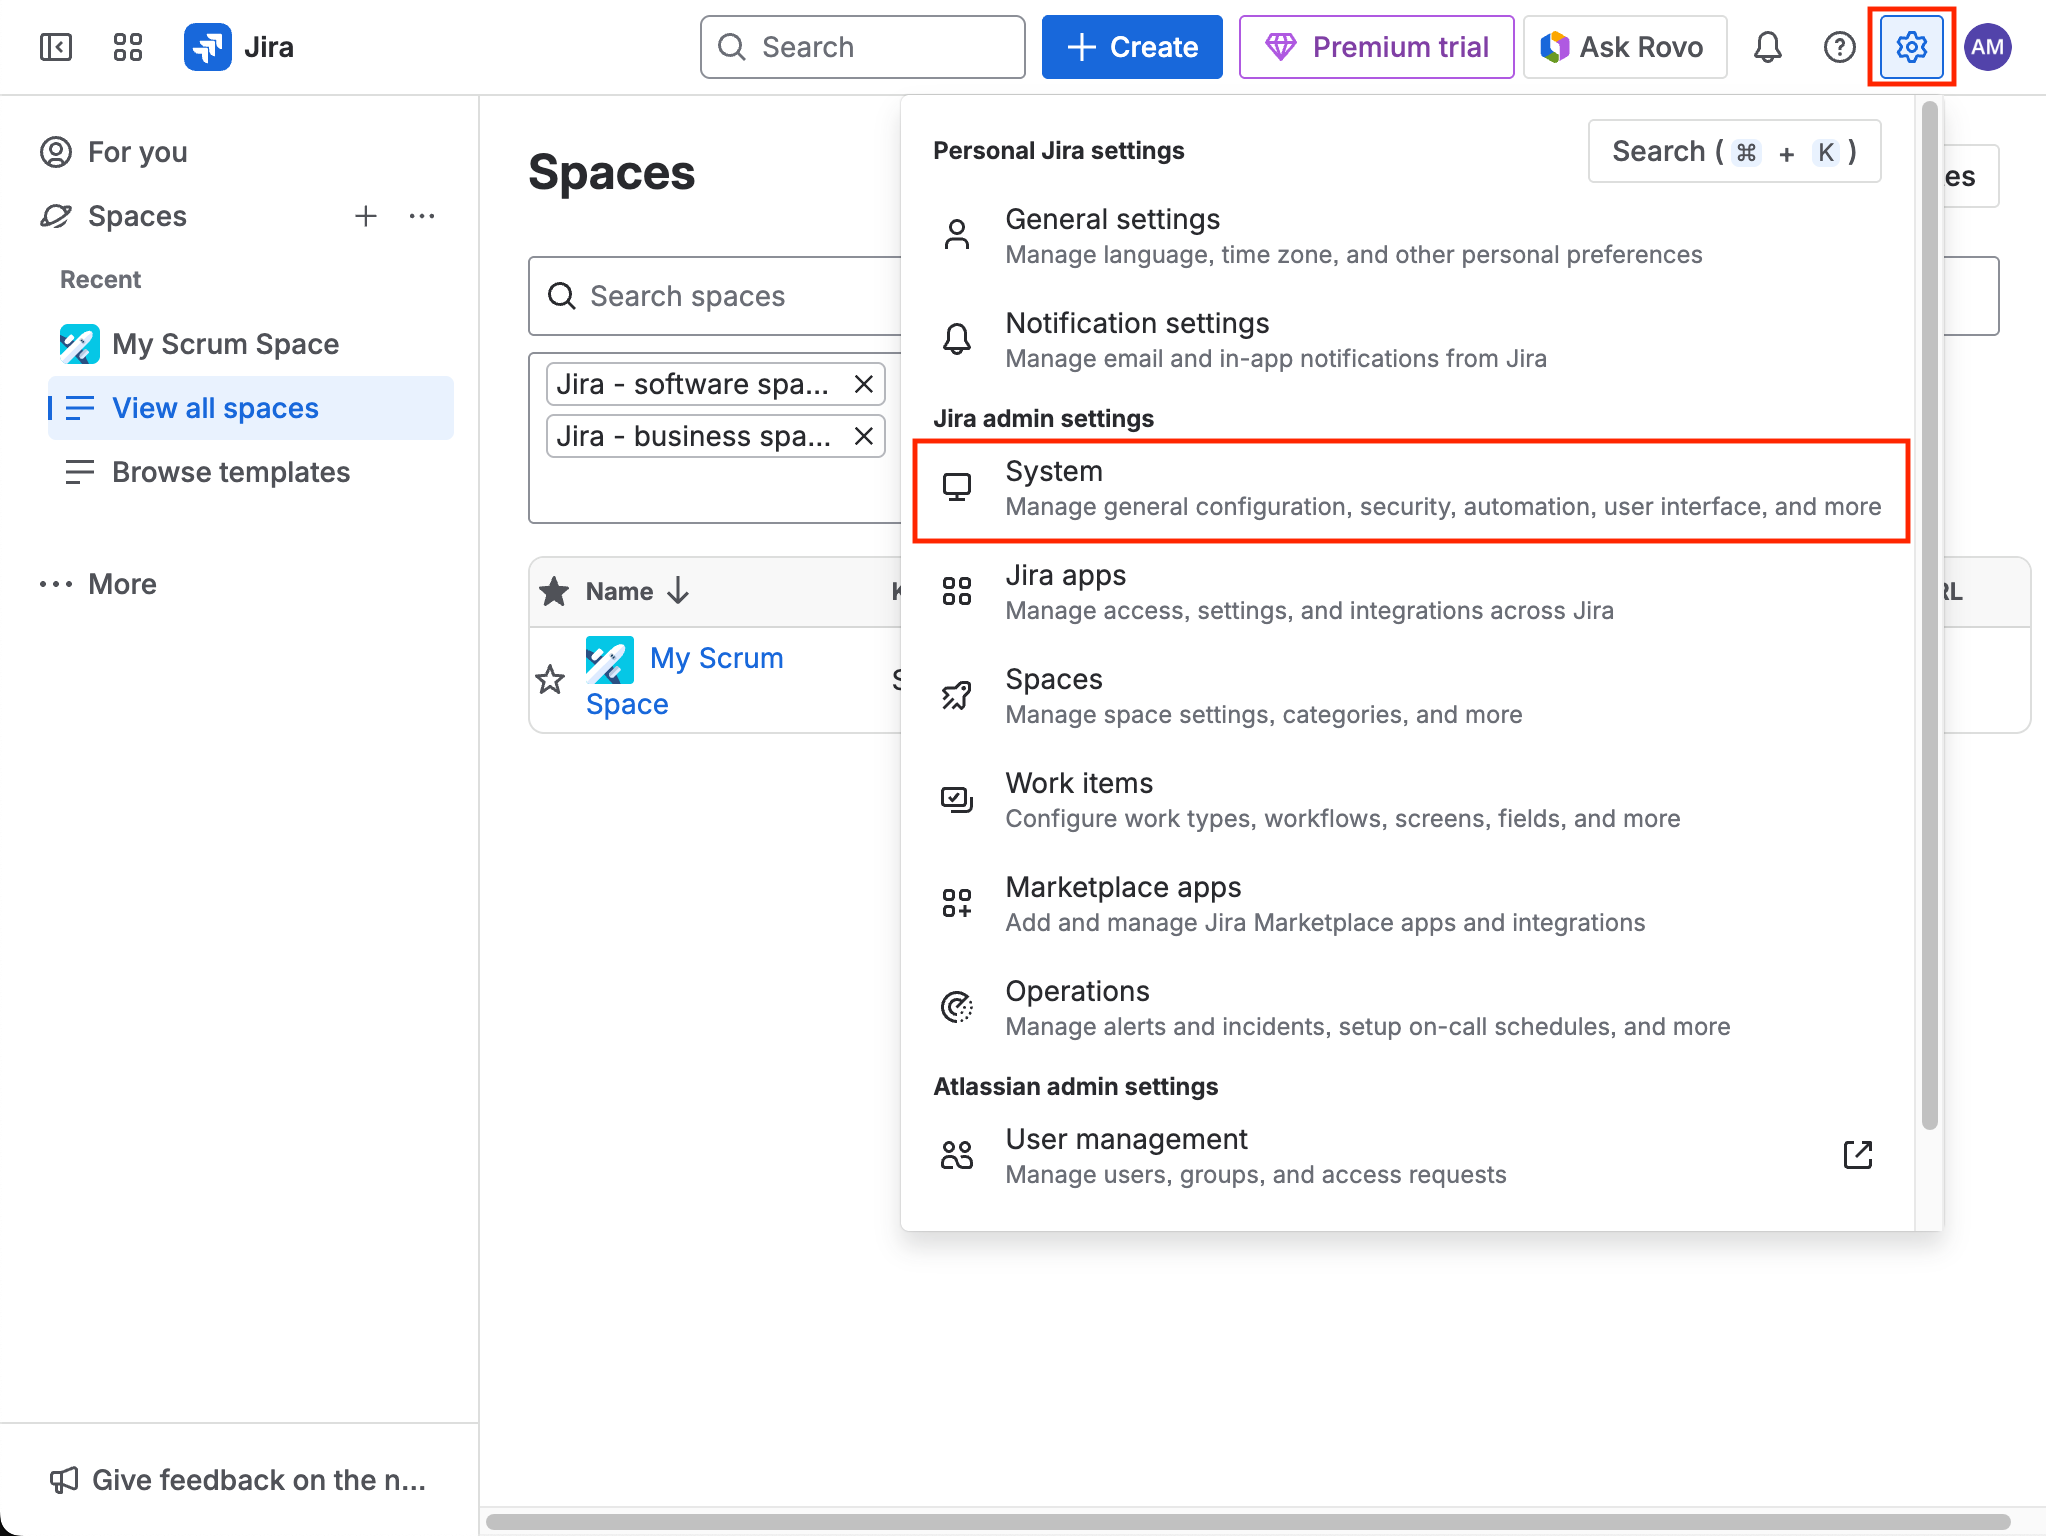
Step 3: Navigate to JIRA System Settings
In JIRA, click the Settings gear icon and select System.
You'll need JIRA administrator permissions to access this section.
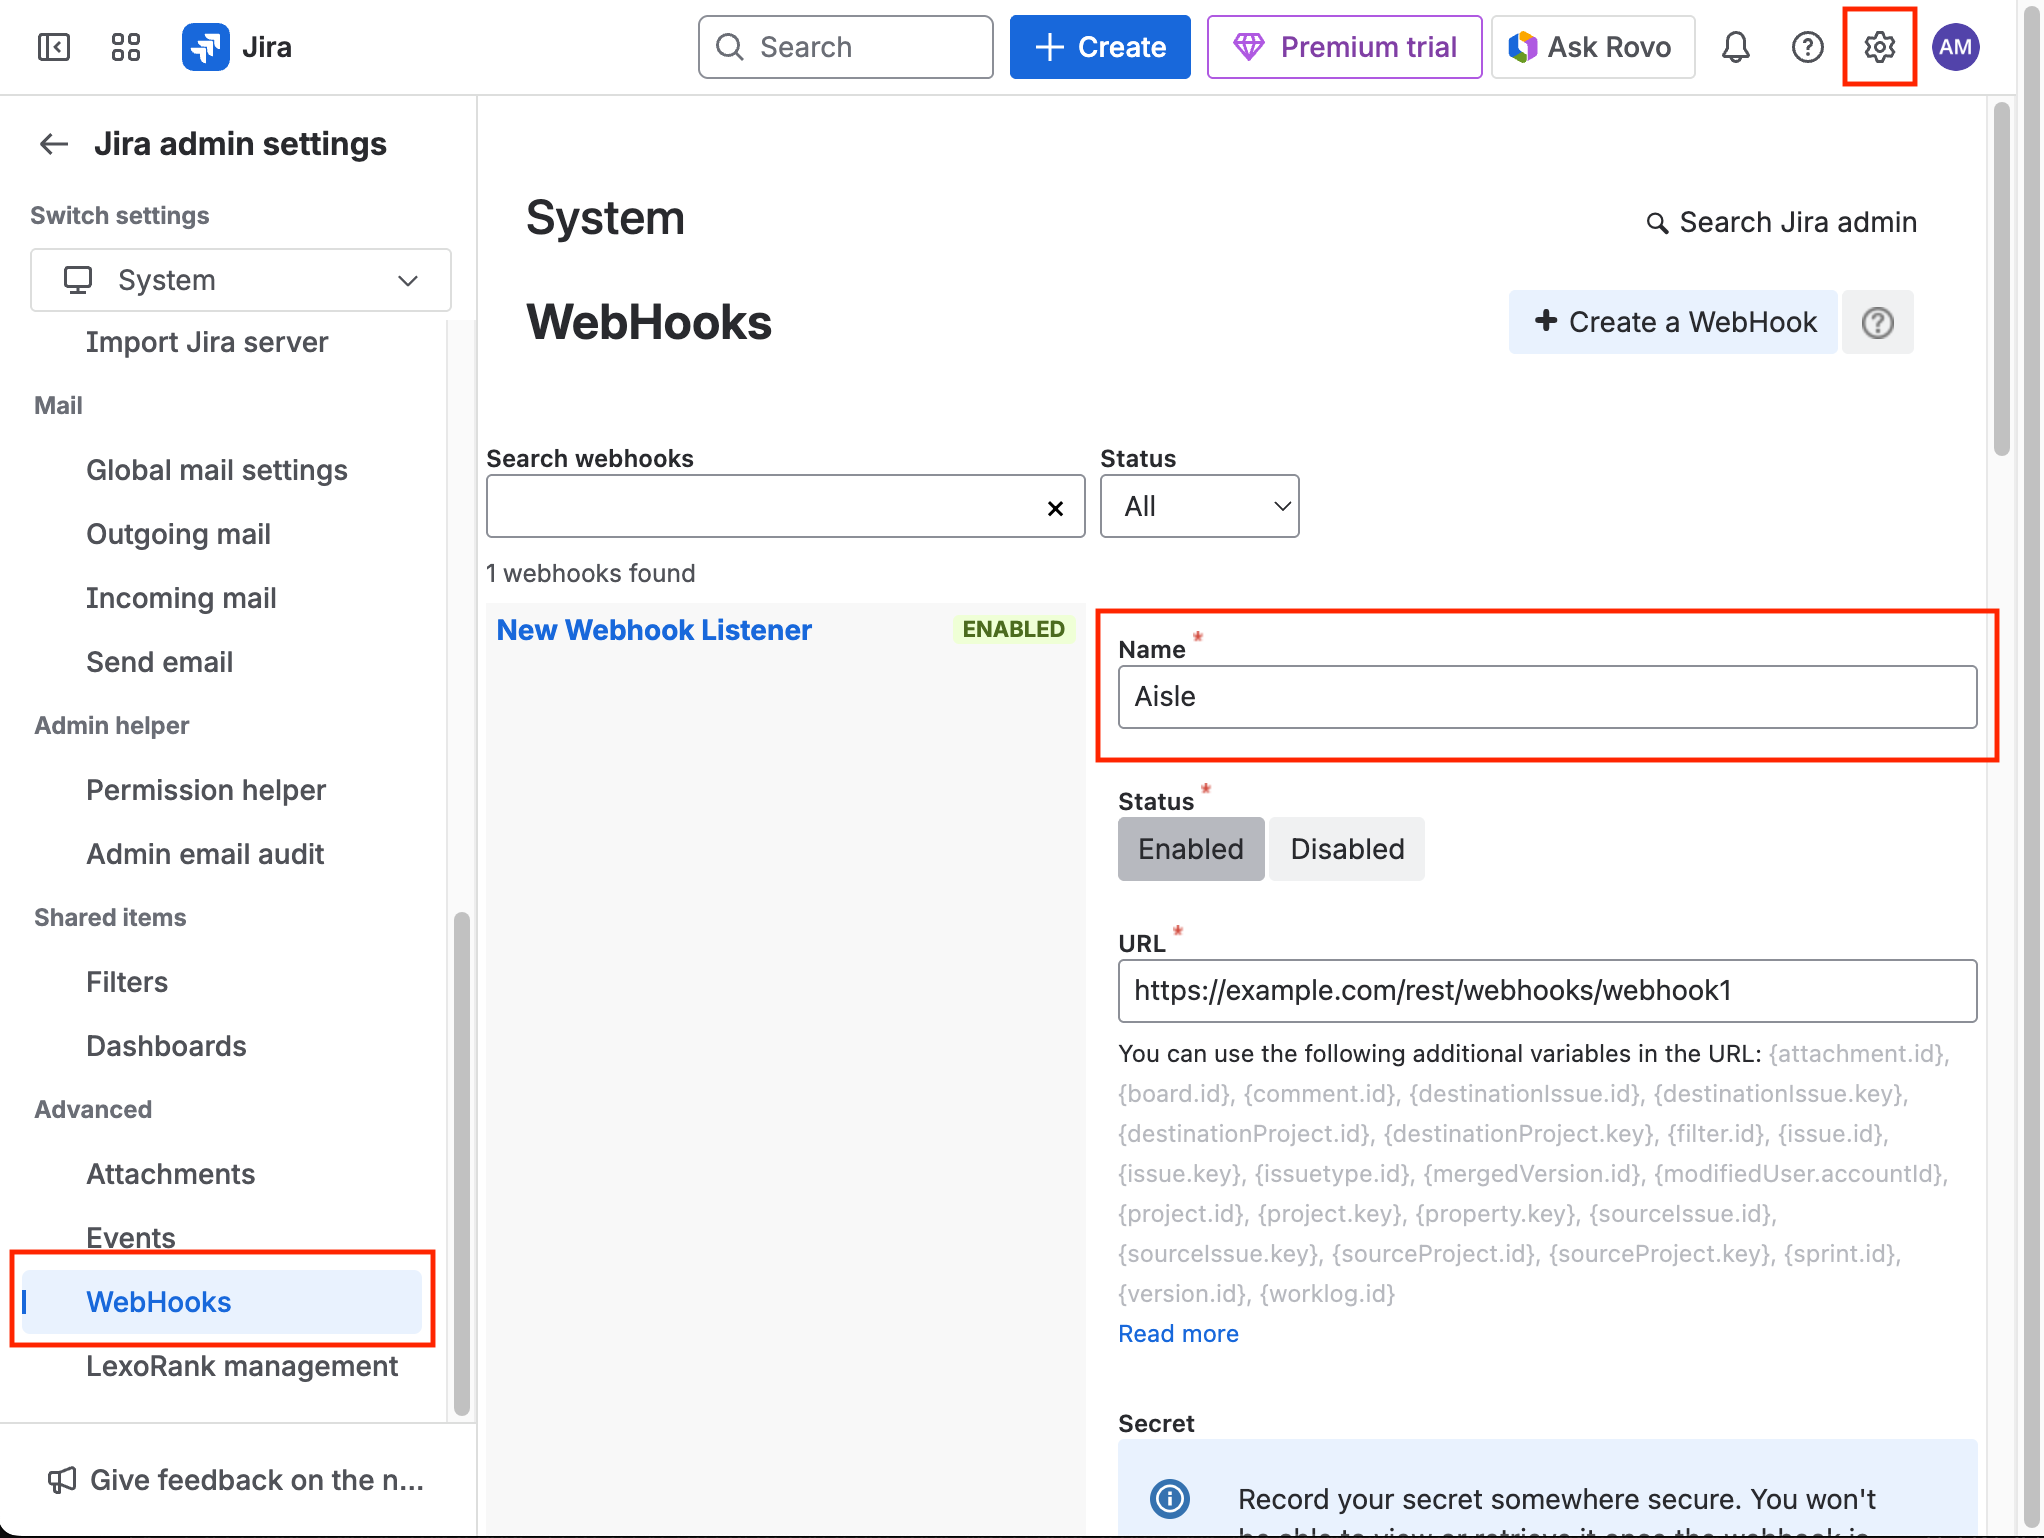
Step 4: Create a New Webhook
In the left sidebar, click WebHooks, then click Create a WebHook. Give it a descriptive name (e.g., "Aisle Workflow Trigger").
Step 5: Optional: Generate a Secret
If you want to verify that webhooks are coming from JIRA, click Generate secret. This is optional but recommended for production use.
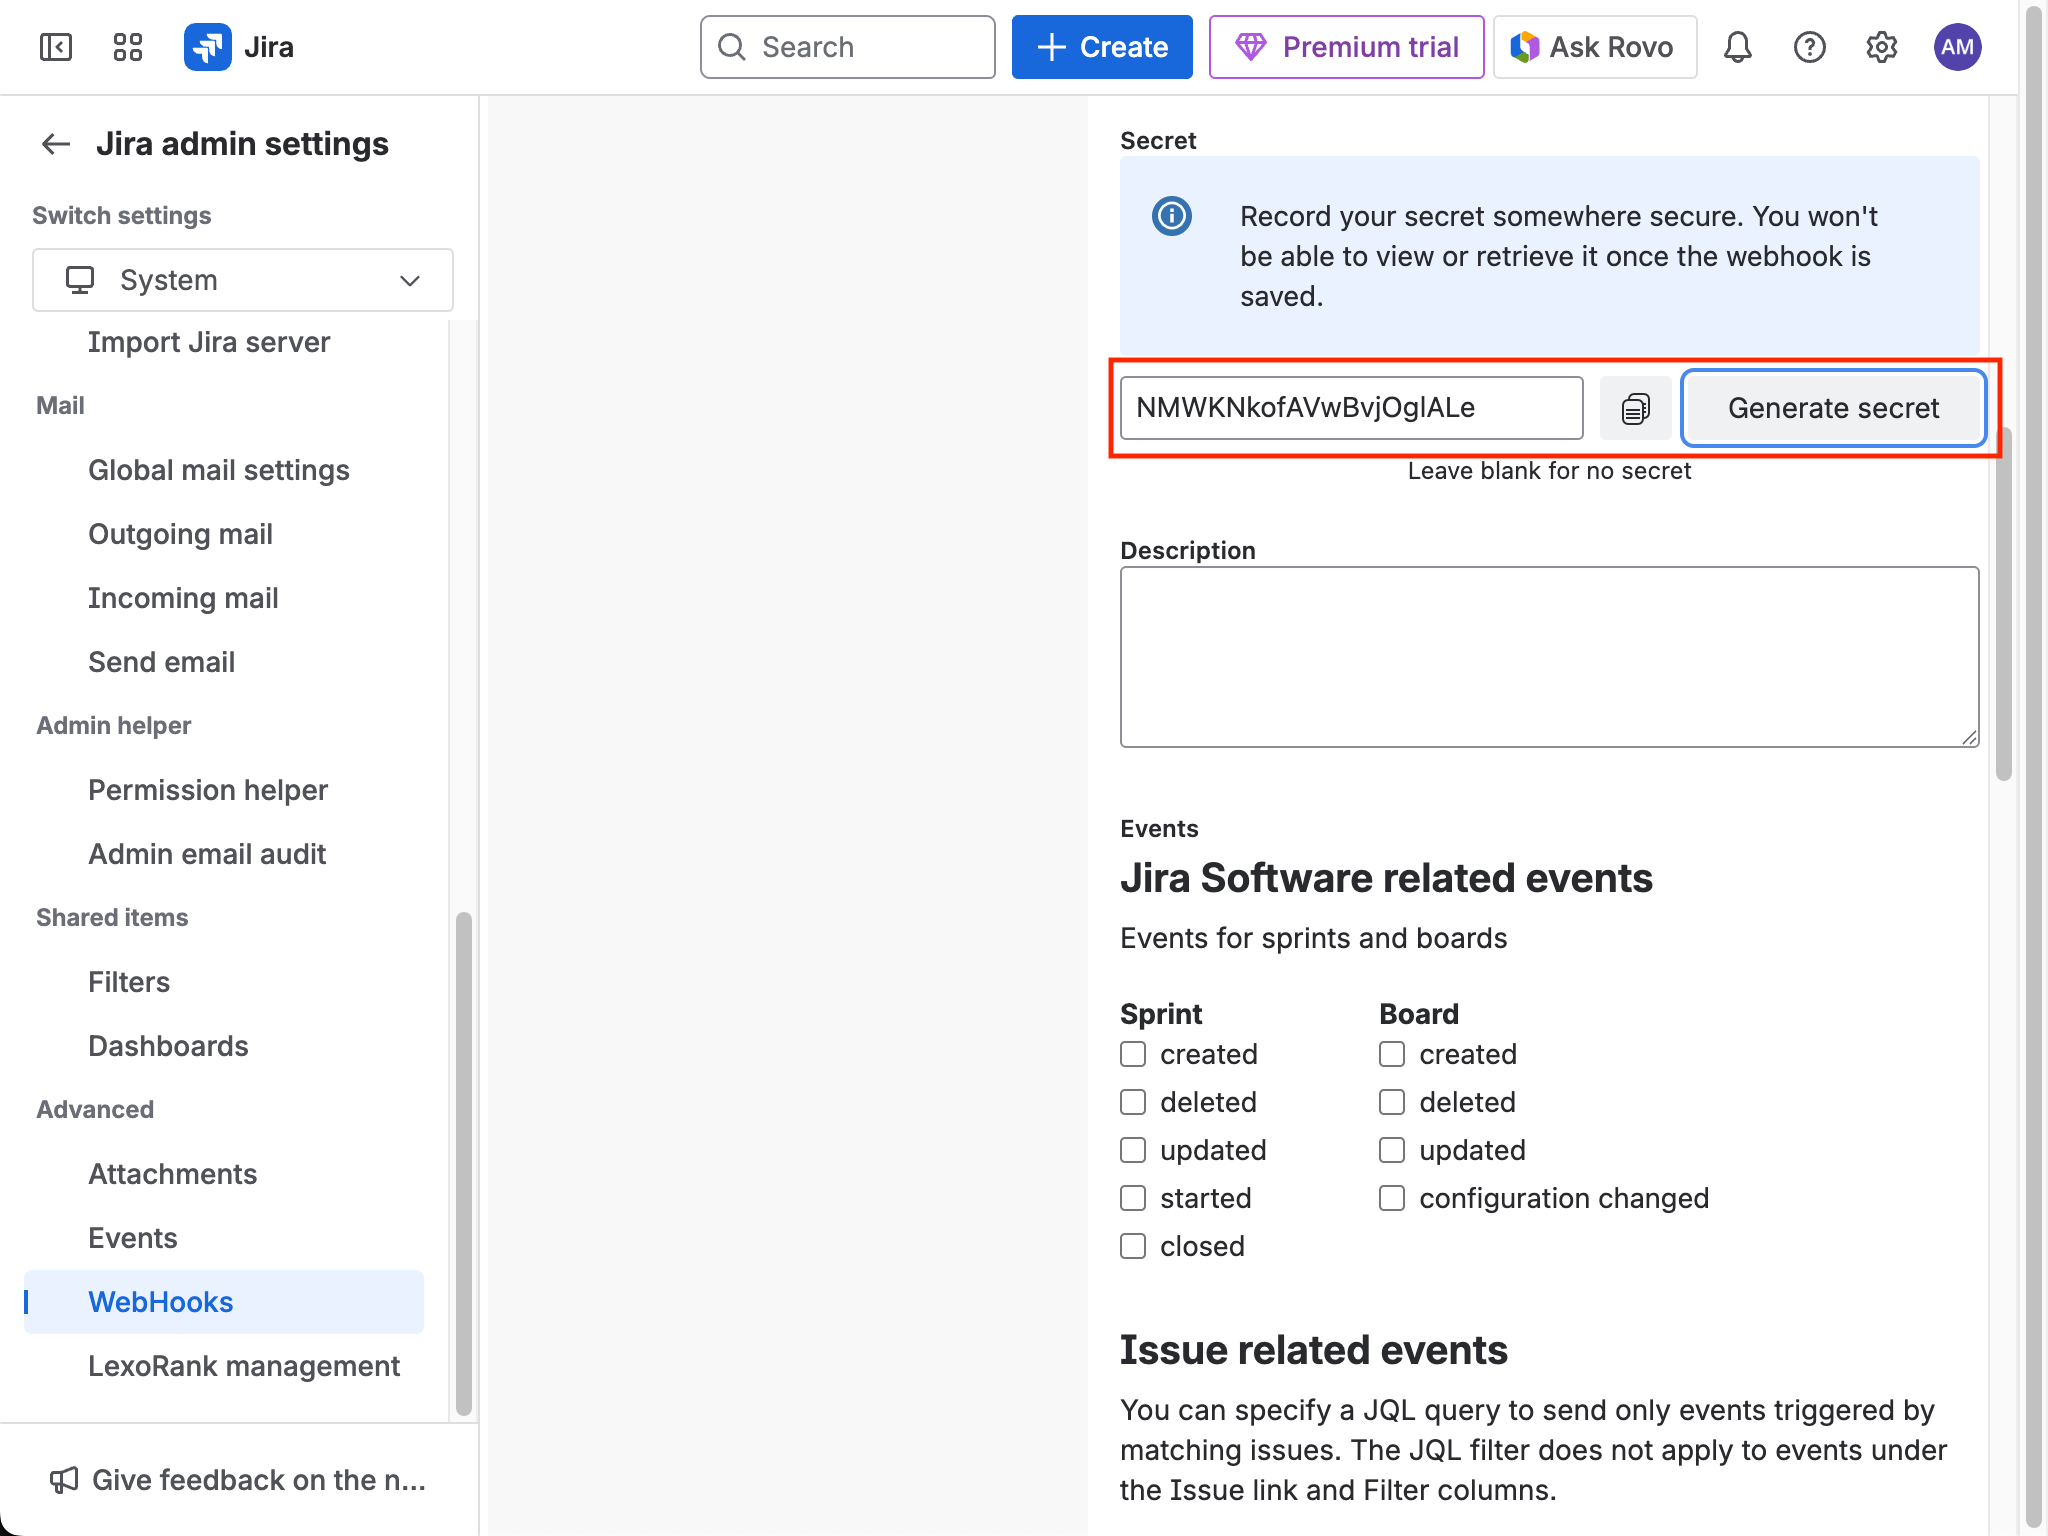
If you generated a secret, copy it and paste it in the Webhook Secret field in your workflow's JIRA trigger settings (Step 2).
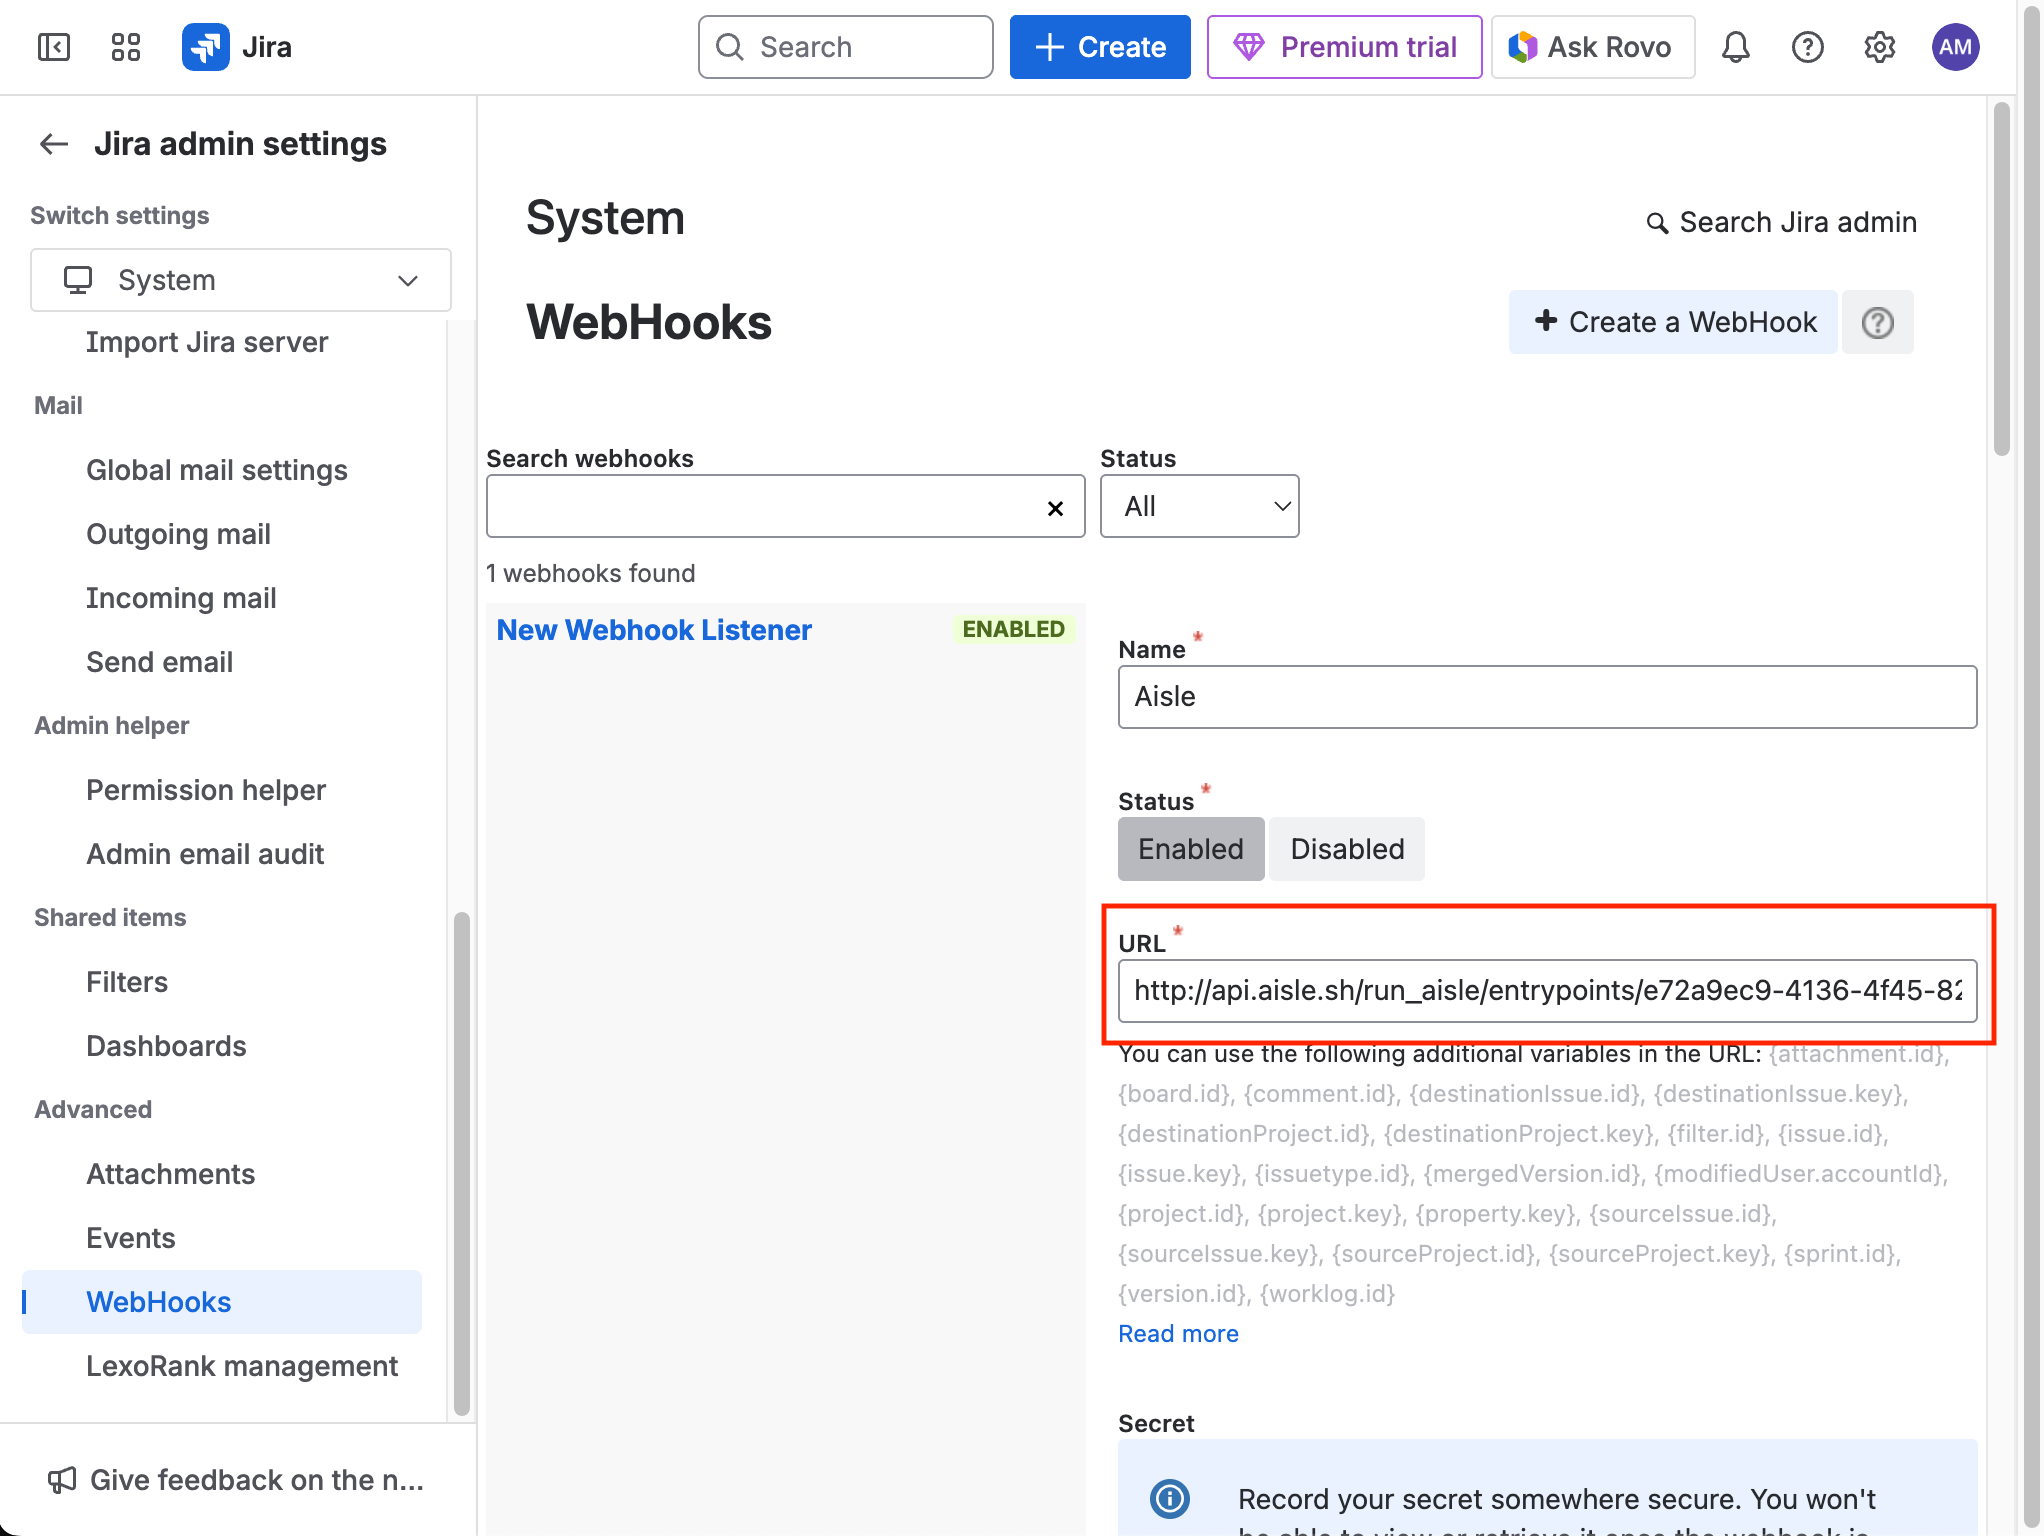
Step 6: Enter the Webhook URL
In the JIRA webhook form, paste the Webhook URL (shown in your workflow's JIRA trigger settings) in the URL field.
Step 7: Select Events
Scroll down and choose which events should trigger your workflow:
issue created- When a new issue is createdissue updated- When an issue is modifiedissue deleted- When an issue is deletedcomment created- When a comment is addedcomment updated- When a comment is edited
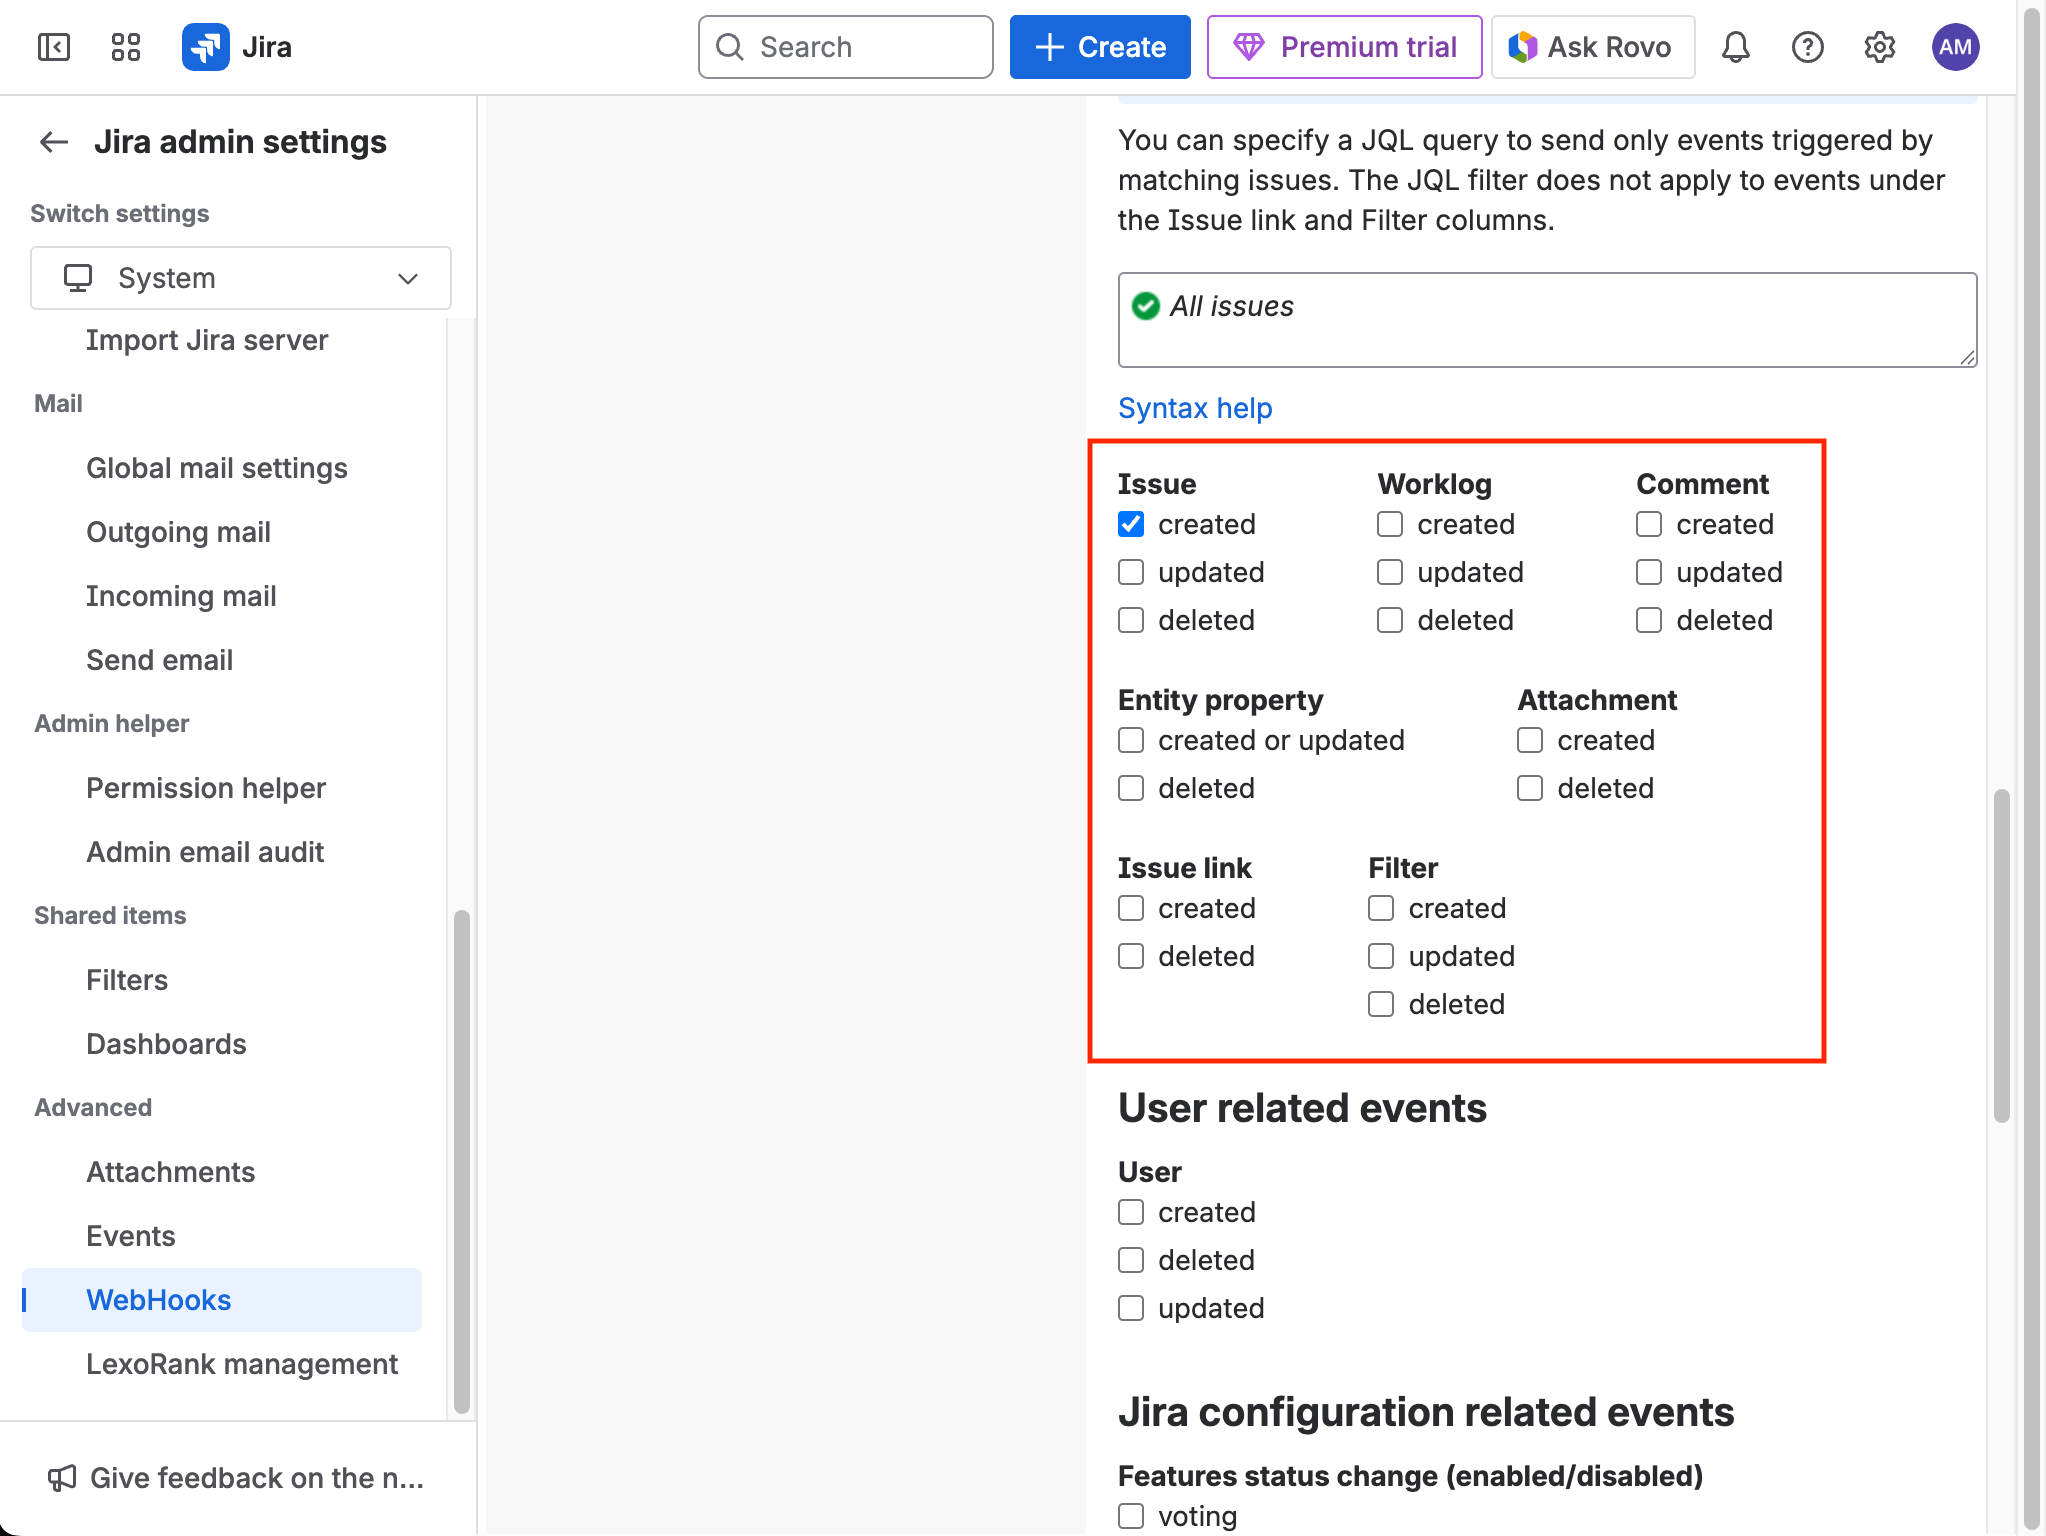
You can optionally filter by project or issue type using JQL in the webhook settings.
Step 8: Create the Webhook
Click Create at the bottom of the page to save your webhook.

Troubleshooting
Common Issues
Permission Denied Errors
- Ensure you have JIRA administrator permissions
- Verify you're accessing the System settings correctly
Webhook Not Receiving Events
- Check that the webhook URL is correctly pasted in JIRA
- Verify the webhook is active and enabled
- Ensure the selected events match the JIRA actions you're performing
Workflow Not Triggering
- Verify your workflow trigger is enabled
- Check that the webhook secret matches (if configured)
- Ensure the workflow is published and active
Missing Data in Workflow
- Verify the events you're triggering match the parameters you're expecting
- Use the
payloadparameter to inspect the full webhook data if needed
Getting Help
If you encounter issues, please contact our support team or check our troubleshooting guides for additional assistance.